- On-Road Vehicles
- Off-Road Vehicles
- Ready To Ship Vehicles
- Most Popular Parts & Accessories
- Search All Parts & Accessories
- Tools & Testing
- Covers
- Accessories
-
Parts
- Bearings
- Bolts & Washers
- Brackets & Mounts
- Cables & Levers
- Clutches, Parts & Covers
- CV Axles
- Drive Belts
- Drive Shafts & Parts
- Electrical
- Engine Parts
- Fuel Parts
- Fuel Pumps
- Full Exhaust & Parts
- Gaskets, O-Rings & Kits
- Intake Parts
- Spark Plug Covers
- Spark Plugs
- Steering Racks & Parts
- Suspension, Kits & Springs
- Filters & Fluids
- Brakes
OEM STYLE PISTON KIT WITH RINGS .020
|
$26.07
|
MPN # 09-759-02
Pistons and Rings Installation Guide: The following guide is intented for experienced mechanics and should not be the only reference for installing a new piston.
Kimpex MICRON Snowmobile Pistons: High performance, long life. Die-cast models available. Engineered to provide the best possible path for combustion chamber heat transfer to cylinder walls Teflon coating.
Kimpex Snowmobile Pistons: High performance, long life. Die-cast models available. Engineered to provide the best possible path for combustion chamber heat transfer to cylinder walls.
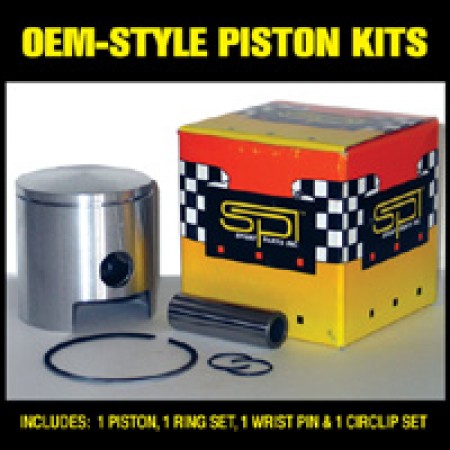
Piston kit includes: Piston, Rings, Pin and Circlips: All pistons, rings, pins and circlips are manufactured to O.E.M. specifications. All individual components will interchange with original parts.
Important Note: Chrome plated rings cannot be used in chrome plated or electrofusion liners.
“Piston Clearance Guide”: Pistons with less than 65mm bore = .0025" to .0035"& Pistons with more than 65mm bore = .0035" to .0045"
- All Kimpex piston kits include piston, rings, clips & pin.
- If the old piston has failed, determine the cause and remedy the problem before replacing.
- Air leaks and/or a lean fuel mixture are the two biggest causes of burned pistons.
- In cases where any part of the old piston is broken or burned through, the crankcase should be disassembled and thoroughly flushed of any debris.
- Measure cylinder for taper and out-of-roundness. Any measured difference of more than .003” (smallest cylinder diameter to largest) would indicate re-boring is necessary.
- Hone good condition cylinder with #220 or 300 grit stones to de-glaze. A 60° cross-hatch pattern is the recommended finish to insure proper ring sealing.
- Measure cylinder for taper and out-of-roundness. These models cannot be re-bored; if a measured difference of more than .003” exists between smallest and largest cylinder diameter, the cylinder must be replaced or sleeved with a cast iron liner. Hone good condition cylinder with #500 grit stones.
- To prevent ring breakage, all horizontal port edges must be chamfered until a minimum 3/64” radius is produced. The best method is to pull strips of emery cloth through the ports or use a round file.
- Remember never install chrome rings in chrome plated, nikasil or electrofusion cylinders.
- Prior to installation, fit each ring into the cylinder bore and measure the end gap to eliminate the chance of ring butting. Acceptable gap range is .010 to .025. If gap is inadequate, carefully file to the recommended specs. See “Piston Clearance Guide”. Clean and lubricate all moving parts with 10W30 oil.
- Install pistons with the arrow pointing to the exhaust side of the engine (except for few models Polaris wheere the arrow points toward the magneto side).
- Install circlips carefully without forcing, bending or turning them. Be sure they seat properly in the grooves and position the openings down.
- Install rings onto matching pistons. Lubricate and check to be sure the end gaps can be completely closed around the locating pins.
- Install new base gaskets, compress rings and carefully slide the cylinders down into position. Before installing the cylinder heads, rotate the crankshaft by hand to make sure pistons and rings move freely into cylinder.
- Overhauled snowmobile engines require a short break-in period. For oil-injected machines, add a pint of 50:1 two-cycle engine oil to the first 5 gallons, running the pre-mix in conjunction with the oil injection system. For pre-mix systems, use 20:1 oil ratio with the first 5 gallons of mix.
- For good engine break-in, set carburetor to rich mixture, avoid sustained high or low RPM operation, vary the driving speed and briefly accelerate at full throttle.


